Volkswagen Golf Service & Repair Manual: Removing and installing seat depth adjustment
| Special tools and workshop equipment
required |
|
|
|
| – |
Remove front seat
→ Chapter. |
| – |
Secure front seat on seat repair stand
→ Chapter. |
| – |
If fitted, remove storage compartment
→ Chapter. |
|
|
|
| – |
Set seat depth adjustment as far forwards as possible. |
| – |
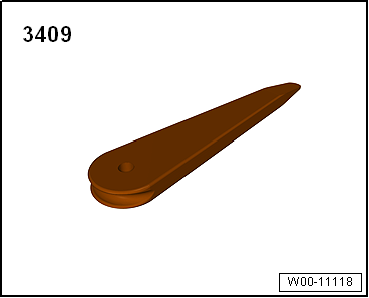
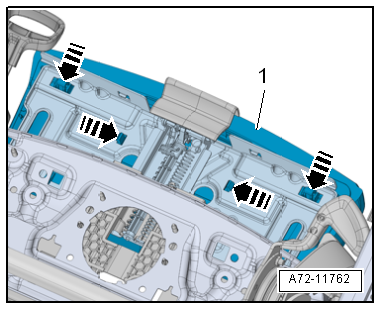
Release locking lugs -arrows-
on trim -1- using removal wedge
-3409-. |
| – |
Remove trim -1- from seat depth
adjustment. |
|
|

|
| – |
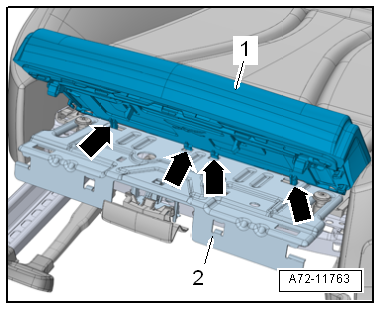
Release locking lugs -arrows-
on carrier from seat depth adjustment using removal wedge
-3409-. |
| – |
Pull off carrier -1- with seat
padding and seat cover for seat depth adjustment upwards and
towards front. |
|
|
|
| – |
Detach tabs -arrows- from seat
depth adjustment -2-. |
| – |
Fold back carrier with seat padding and seat cover upwards. |
| – |
To do this, pull off carrier -1-
with seat padding and seat cover for seat depth adjustment
upwards and simultaneously towards front. |
|
|
|
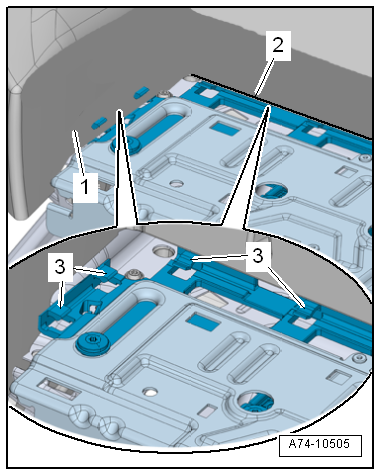
| – |
To do this, unclip seat cover -1-
from locking lugs -3-. |
|
|
|
| Vehicles with massage control unit -J740- |
| – |
Remove massage control unit -J740-
→ Chapter. |
| – |
Pull out seat depth adjustment. |
| – |
Unclip retaining lugs -1-. |
| – |
Lower bracket for massage control unit -J740--2-
in area of retaining lugs -1-. |
| – |
Push bracket for massage control unit -J740--2-
in -direction of arrow-. |
| – |
Detach bracket for massage control unit -J740--2-
from mountings -arrows-. |
|
|

|
| Continued for all vehicles |
| – |
Slide seat depth adjustment towards rear. |
| – |
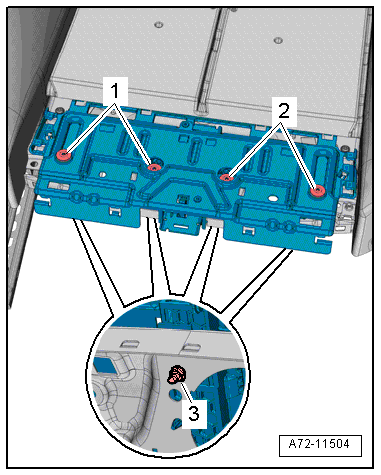
Remove bolts -1- and
-2- |
| – |
Counterhold on nuts -3- on seat
depth adjustment while doing so. |
|
|
|
| – |
Unclip locking lugs -1- and
-3- using removal wedge -3409-. |
| – |
Pull seat depth adjustment -2-
upwards and towards front off seat pan
-arrows-. |
| – |
Detach tabs -4- from seat pan
while doing so. |
| – |
Remove seat depth adjustment from front seat. |
| Install in reverse order, but note the following: |
|
|

|
| |
The two outer bolts are provided with a plastic guide
→ Anchor. |
| |
Ensure proper allocation. |
| |
→ Chapter „Assembly overview - front seat“ |
| |
→ Chapter „Assembly overview - seat pan“ |
| |
Assembly overview - seat depth adjustment
→ Anchor. |
|
|
|
Special tools and workshop equipment
required
Torque wrench -V.A.G 1331-
...
Note
The handle for seat height adjustment can be renewed with
front seat installed.
Removing
Note
...
© 2016-2024 Copyright www.vwgolf.org

 Note
Note Caution
 Removing and installing front backrest
 Removing and installing handle for seat height adjustment